Super Quick RAMM Hacks: customise the point symbols in your RAMM map
This post is part of the Super Quick RAMM Hacks series! In just 1 or 2 minutes, discover handy bite-sized tips and tricks to optimize your RAMM experience and workflow.
Today, we will walk through how to customise the symbols for point assets in the RAMM Map.
This customization functionality is a recent addition to the software, which provides more visual control over how your data is spatially displayed. Let’s dive in.
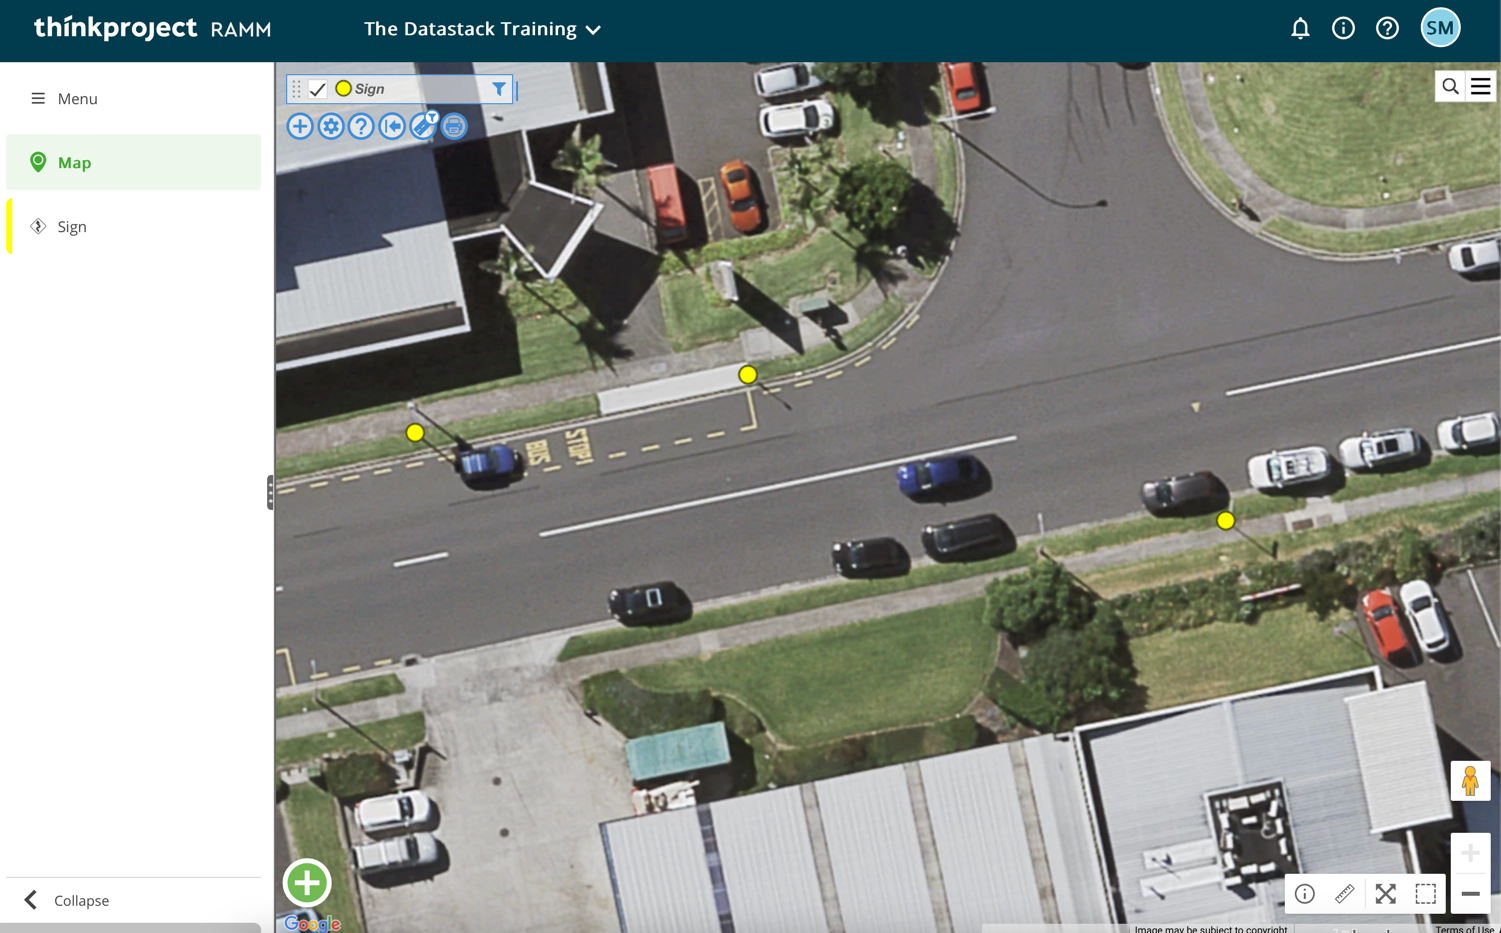
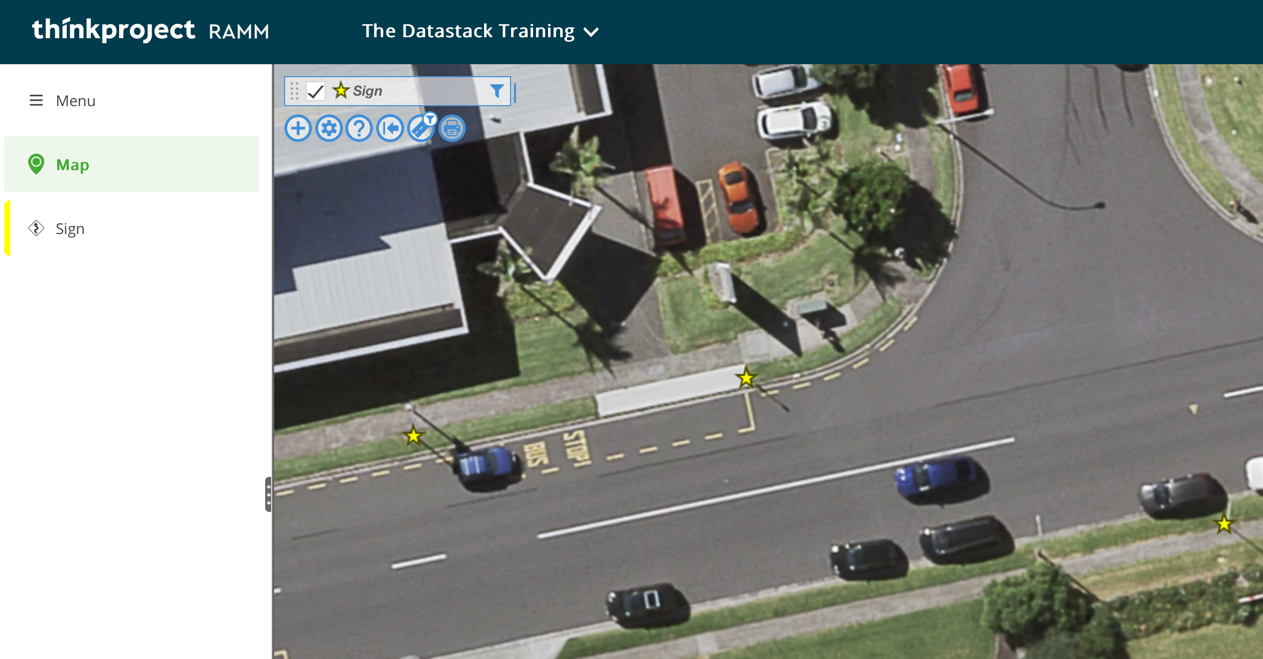
Here, I have three signs on my map, represented by the yellow circles.
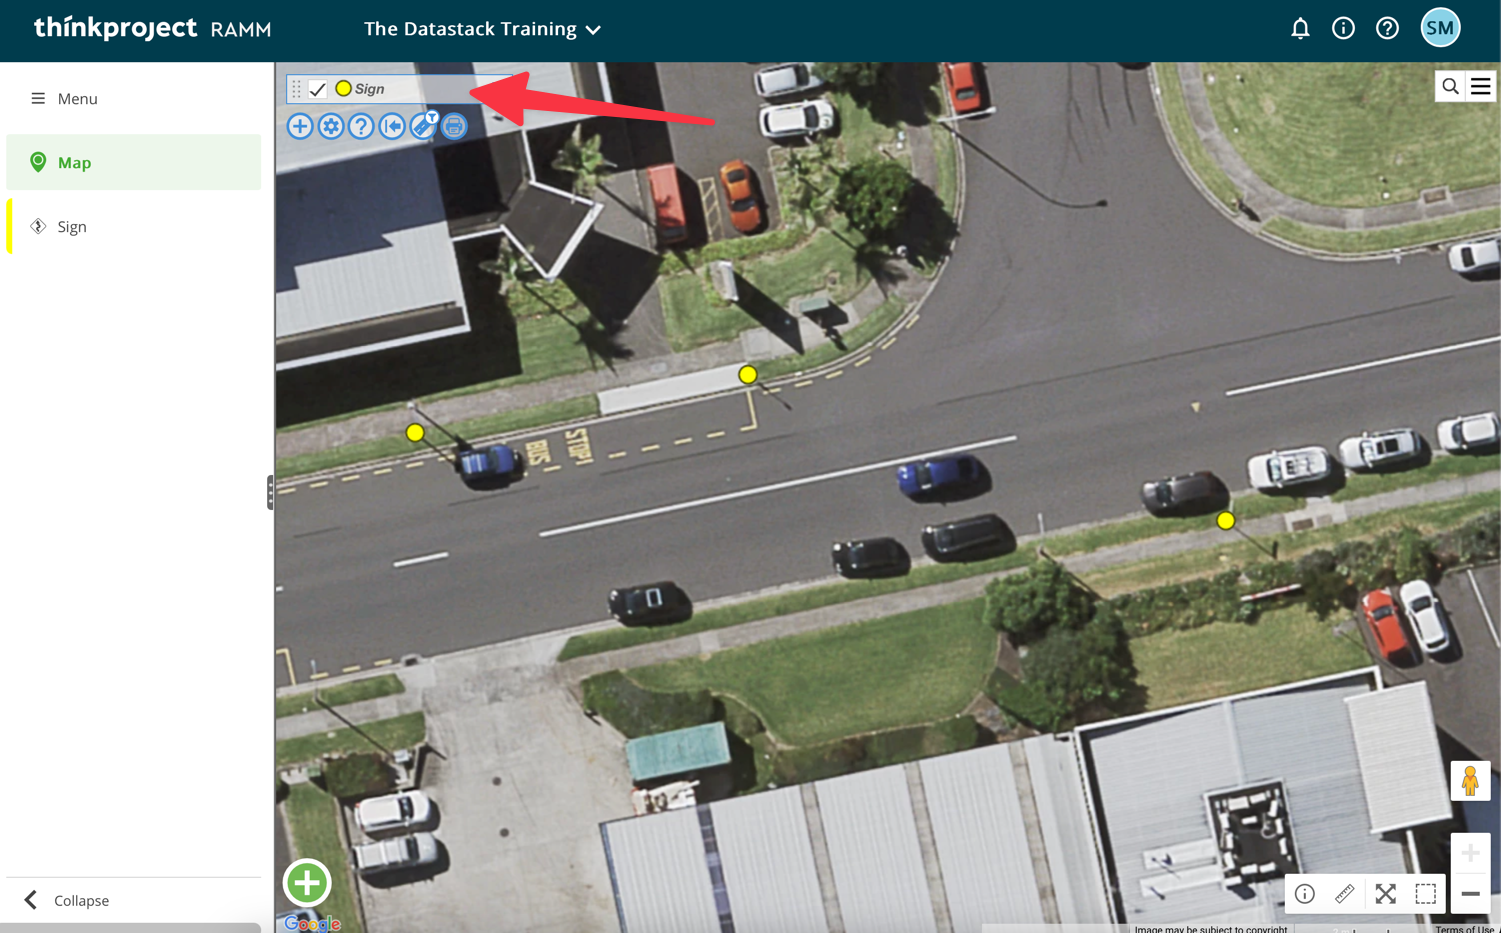
To customise the point symbol, click on the layer name in the top left of the map (where the red arrow is pointing in the screenshot).
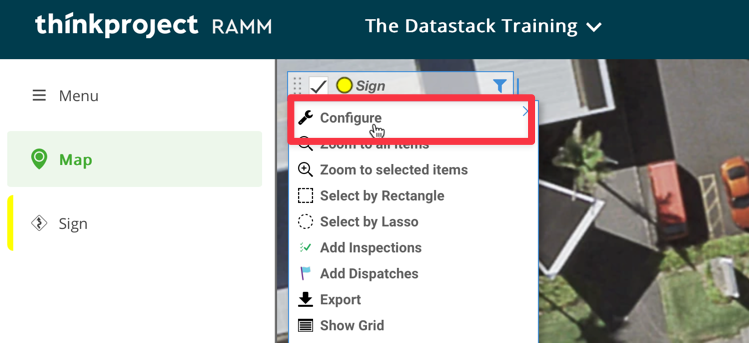
In the drop-down menu that appears, click Configure, the first option in the list.
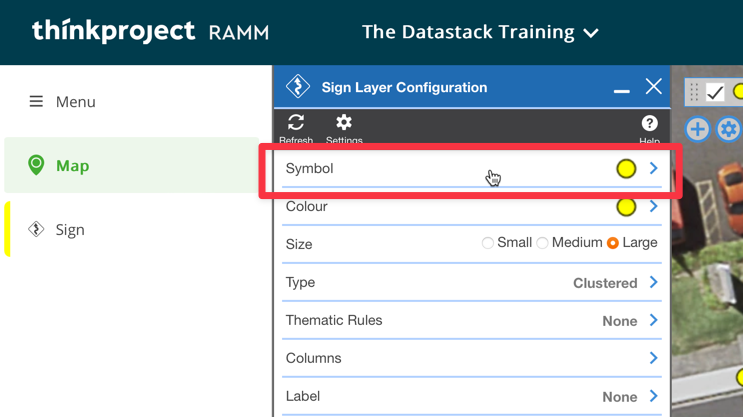
This will open the Layer Configuration screen. Click the Symbol option here, which is also the first item in the list.
This will reveal the library of symbol options available for use on your map. At the time of writing this post, only four symbol options are available. However, the library is expected to expand over time to give you a more extensive range of symbols to select from.
So now, click on the symbol of your choosing. For this demo, I am going to go with the star symbol.
Now, returning to the map, the sign symbols have been updated to our chosen star option.
This functionality to change symbols for point layers will give you more visual control and customisation of your RAMM map. And it will help differentiate between datasets when multiple layers are visible on your map at the same time.
Check back soon for more articles in the Super Quick RAMM Hacks series.

