Building an On Air sign for the home office
COVID-19 has brought many changes to the ‘normal way of life’. In a work context, working from home and the subsequent increase in the number of video meetings has certainly been one of the bigger changes.
These calls have introduced a new set of challenges to navigate as well. From noisy neighbours, to lawns being mowed, to ambient sounds of construction work and sirens.
And of course … disruptions from younger family members.
Wanting to avoid such scenarios on Microsoft Teams or Zoom calls, I thought it would be cool to have an On Air sign outside my office door. I started doing a bit of research and found others had done similar things.
So this post is a quick look at my own take on an On Air sign for my home office.
Please note that this endeavour also totally wasn’t an excuse to do a fun side project. One which required buying and playing with some new hardware and writing some code.
No. Not at all!
The hardware
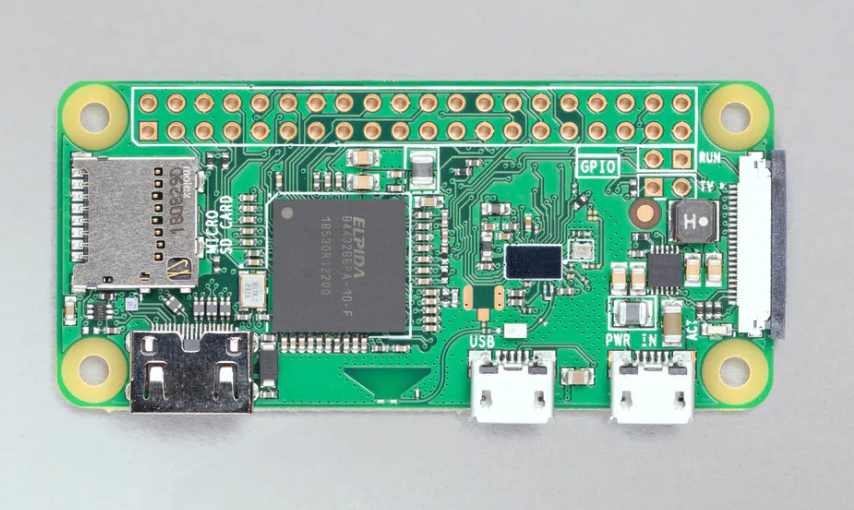
For my On Air sign I decided to build a solution using a Raspberry Pi Zero. The Raspberry Pi Zero is a neat little computer which comes in a very small form factor.
For the display itself I opted for an e-ink display (from a sea of different options). If you are not sure what an e-ink display is, think along the lines of the screen on a kindle or kobo e-book reader. The one I am using is a 2.13 inch model from Waveshare.
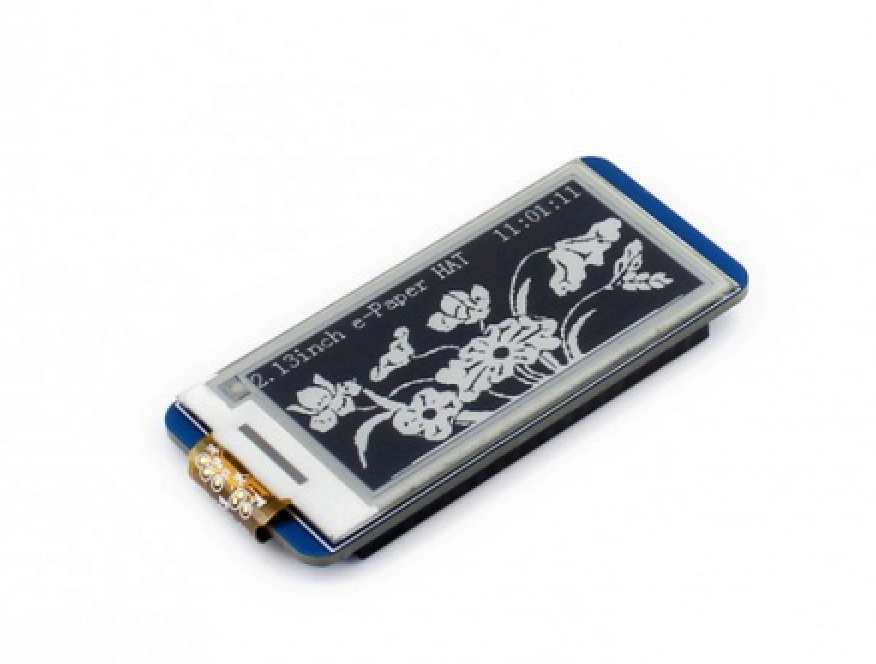
What I liked about the e-ink display was its relative low energy usage, and that I could pass it images and messages to display (rather than using something like a set of coloured LEDs).
I think this hardware setup gives some flexibility and reusability for other future use cases as well.
Creating a custom API to communicate with the sign
I built a small custom API (application programming interface) to handle the management of the On Air sign messaging. For this initial version I just created a small handful of endpoints;
one endpoint to set the board to show the On Air message
another endpoint to set the board to show the All Ok message
a final endpoint to return the current status of the board. I don't really use this one at all, as everything updates automatically based on the selected status. But it’s there just in case.
There is a webserver running on the Raspberry Pi to accept the API requests. This triggers the code to change the message on the On Air sign. The webserver has been to set to boot up automatically - which is useful if the Raspberry Pi power ever cycles off.
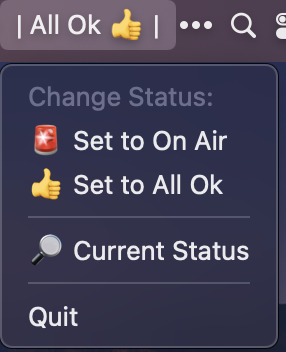
An app on my MacBook Pro to change the sign message
I wanted to have a simple GUI interface on my MacBook Pro to change the status of the On Air sign. So I wrote a small app that sits quietly in the MacOS status bar. At any time it shows me the current status of the On Air sign.
There is a thumbs up for the All Ok status (i.e. disruptions are ok) …

And there is a red light for the On Air status (i.e. no disruptions right now) ...

The app makes it super simple to change the status when needed. Clicking the icon will show a drop down to switch between On Air and All Ok modes. I can also get a notification of the Current Status if needed.
So this makes it very simple to jump into On Air mode when some disruption-free time is needed. And with the status being manually set, this can happen regardless of being in a video call or not.
The final product
Mounted at a toddler friendly height outside my office door, this Raspberry Pi powered On Air sign is a neat little anti-disruption solution.

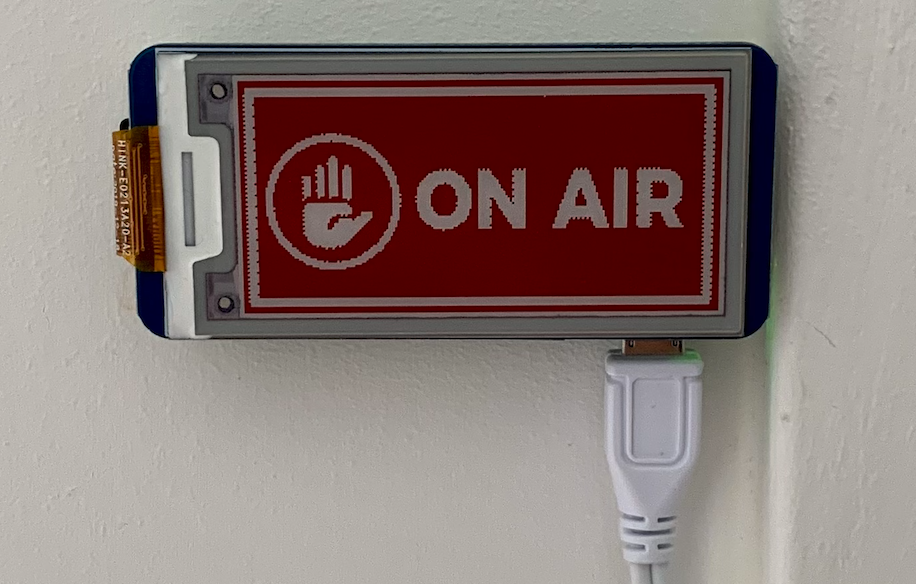
Due to user feedback from the target audience, the iconography for On Air sign was changed to a hand signal instead of the original red light. Hey, it’s always important to get user feedback!
Future planned improvements for this setup include building a case to give the sign a cleaner look around the edges (is that an investment in a 3D printer I hear?). Once I have the case sorted, I am also going to sort out a tidier power cable solution as well. The current cable setup definitely favours function over form.
This was a fun little project to build. And it has been super effective so far, with no interruptions to report… well not yet anyway!