How to remove a core RAMM table with Table Manager
A few months back on this blog, I posted this article; the RAMM feature you have always (probably) wanted is nearly here.
In today's article we take a look at that very feature, RAMM Table Manager. We will focus on one particular aspect of the app: how to remove a core RAMM table.
In particular, the goal for today will be to remove the Features table from our RAMM database.
Please note that as of time of writing, Table Manager appears to only be available in RAMM Beta. By default, when you log into RAMM you are directed to the production version of the software. Therefore you will need to login to RAMM Beta to check Table Manager out. If you want to know how to switch over to RAMM Beta, you can follow this guide here.
Let's jump in.
Opening the table manager app
First up we need to find our way to the Table Manager app. To get started, open up RAMM to the RAMM Menu screen…
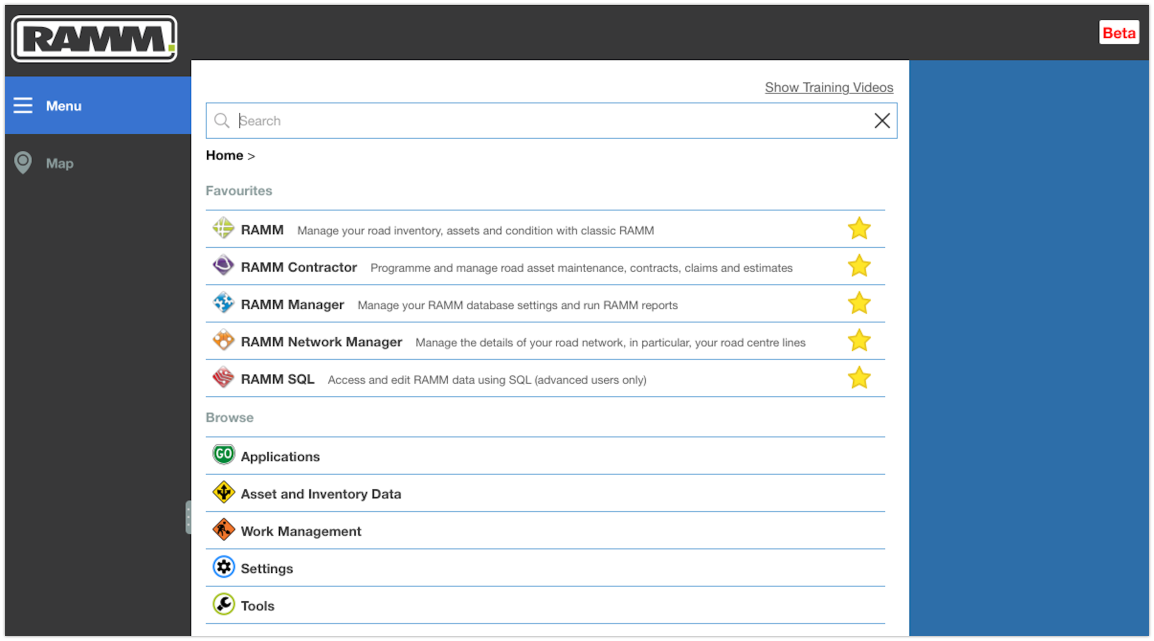
In the search bar at the top of the window, type in table manager. This will return the list of search results, and you should see Table Manager there. Click on Table Manager to launch it.
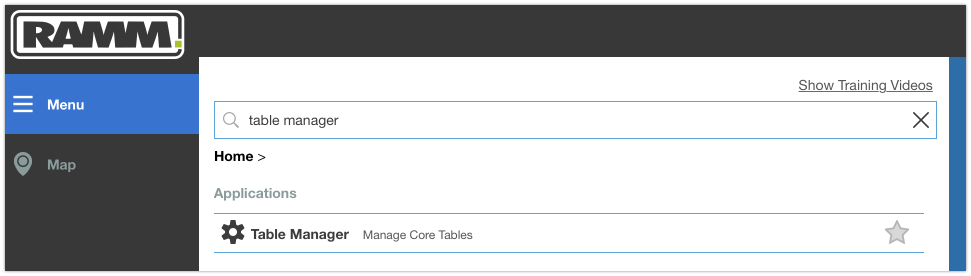
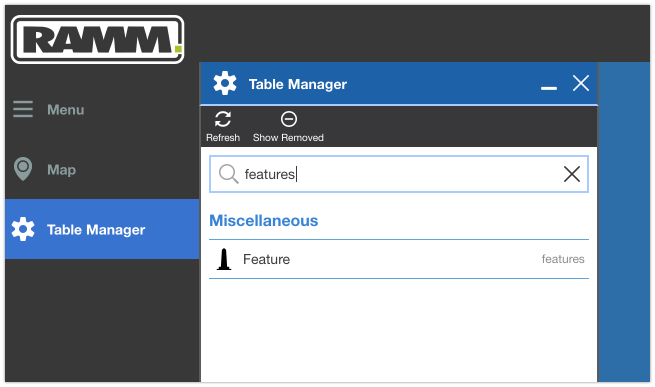
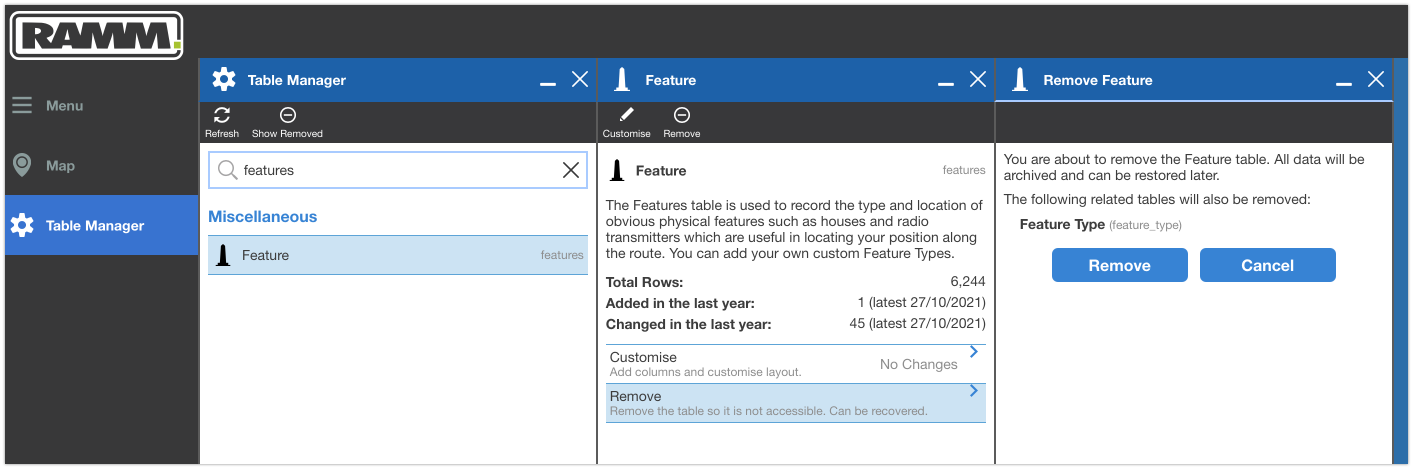
A whole bunch of core RAMM tables will be listed initially. As noted earlier, the goal for today is to remove the features table. You could either scroll down to find it, or otherwise just type features in the Table Manager search bar. The features table should appear in the search results list.
Clicking on the table name will show a second panel with more details. This includes some basic summary statistics about the selected table, such as;
how many rows of data are in the table
how many rows of data were added in the last year
how many rows of data were changed in the last year
audit dates of the latest activity
Of particular interest for what we are doing right now; there is also the option to Remove the table.
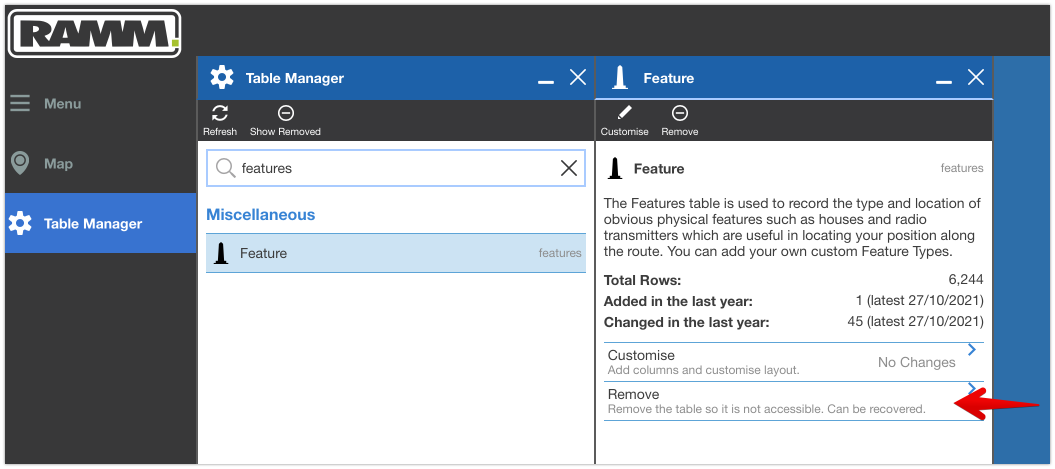
You will note the subtitle for the action includes the comment of 'Remove the table so it is not accessible. Can be recovered'.
After selecting the remove action, a third panel will appear. This will confirm the action you are trying to perform. importantly it will also let you know of any other associated tables that RAMM will remove.
In the screenshot below, you can see that alongside the features table, RAMM will also remove the feature type table as well (this is just a lookup table referenced by the features table).
Click remove and the removal process will begin. After RAMM has done it’s thing, you will get a small message window informing you the table has been removed…

And that is it - the table has been removed so job done. In terms of software processing time, it only took a couple of seconds (if that) for the features table to be removed from the database.
What does removed really mean in Table Manager?
Removed in this context means 'hiding from view' rather than a straight out delete. As we saw in the Table Manager app, it does let you know the data will be archived and can be restored later.
So removing a table via Table Manager doesn’t mean it’s totally gone.
It is just gone for now.
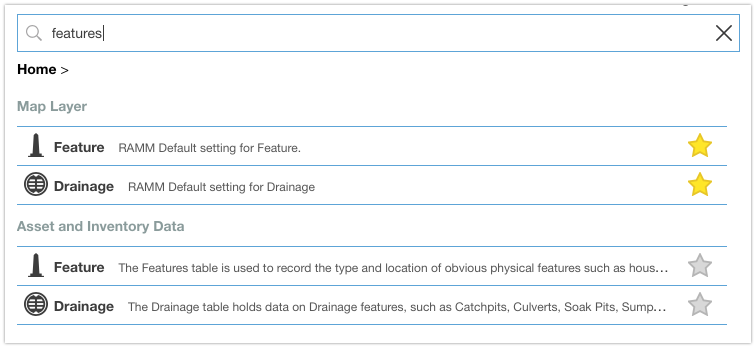
With the table removed, you will no longer see it in RAMM HTML. In the screenshot below, searching for the features table in the RAMM Menu returned only the drainage table (presumably as the search keyword of features is in the drainage table description).
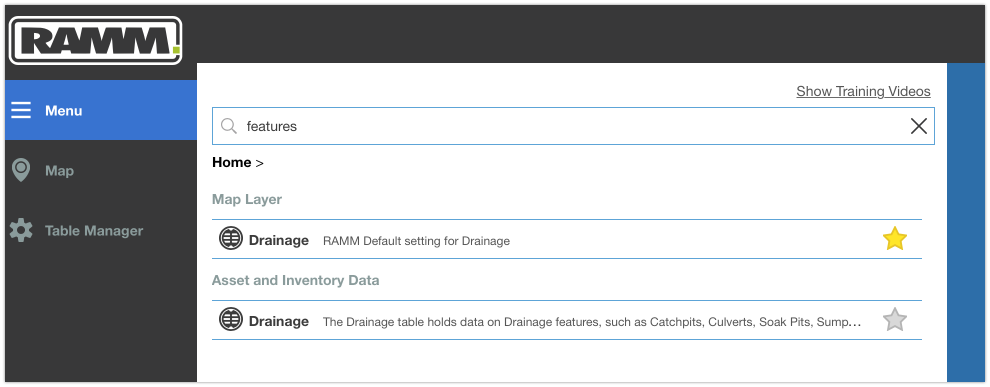
This means that features are now no longer visible in RAMM HTML. This accomplishes the goal of removing the table from the database.
Interestingly though, if you jump over to RAMM SQL, it is actually still possible to query the table.
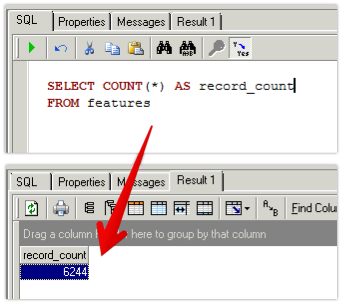
It is not clear if the table being accessible via RAMM SQL is actually an intended outcome or not.
But for now, this is kind of a neat work around if you need to access the data in the table for some reason. It means you can still query the table, without needing to go through the process of restoring the whole thing again.
Bringing the table back to RAMM HTML again
The process to restore a table is very quick. And it's also done via the Table Manager application.
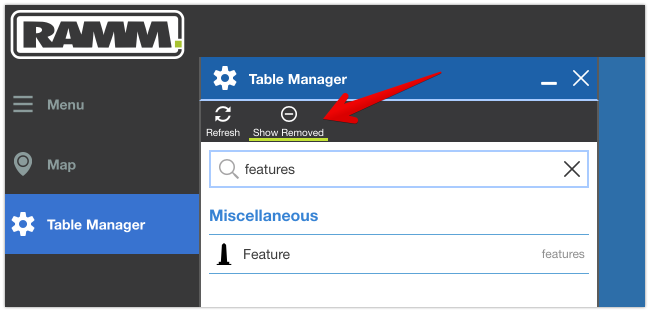
At the top of the Table Manager app is a Show Removed icon. This will give you a list of all tables removed from the database (including the features table we have just removed).
Clicking on the table name in this list will bring up that familiar panel with details of the table. This confirms all the original data is still there and in tact,
However, the previous action to remove the table has now been replaced with a Restore action. As the description states this will 'Restore archived data and make the table accessible.'

Selecting Restore will bring up a third detailed panel to confirm the action.

Clicking the Restore button here will bring the table back and give you another prompt to confirm the change has happened. Similarly, we are talking only a couple of seconds at most that was needed to restore this table.

After it is back, you can search for features in the RAMM HTML menu and the table will be accessible again.
Keeping your database lean and mean has its advantages. Unused tables, or those with redundant or unmaintained datasets can cause all sorts of issues from confusion through to misinterpretations around currency and relevancy of data.
Therefore the Table Manager app provides a nice little solution to remove such tables from view in RAMM HTML. Well, remove them at least for now…you can still restore these tables later on down the track.