How to setup a new security zone in RAMM
Today we are going to create a security zone for the TalkData network. In the previous post we digitised a bunch of new roads in a hypothetical TalkData network. So now we are going to add these roads to their own security zone in RAMM.
To start with though we will give a really quick overview of security zones in RAMM. We will then go through the step-by-step process of setting up the TalkData security zone, using the RAMM HTML application.
What is a security zone?
Put simply, a security zone is a group of roads in your network.
Each road in a RAMM database has its own unique Road ID (the road_id attribute). A security zone is defined by specifying one or more of those Road ID's to be included within the zone.
So a security zone is basically just a list of roads.
You will typically see security zones defined using geographic or contractual areas. Say you were managing a network with two road maintenance contracts. You could setup one security zone per contract area. Each security zone would contain just those roads that fall within the applicable contract boundary.
It is not a requirement for each security zone to contain a mutually exclusive lists of road. A single road can belong to one or more security zones in your database.
What functionality does a security zone provide?
Security zones provide a few different functions within RAMM. One of the key functions is their use for managing or controlling 'user access' within a database.
When someone connects to a security zone, the data they can see is limited to just the group of roads included in that zone. This extends to the asset data associated to those roads. In RAMM most asset and condition records relate back to a road_id. So the security zone restrictions will apply to these related asset records as well.
Lets take a network with the following two security zones and roads;
- A North security zone which includes Queen Street
- A South security zone which includes King Street
If I connect to the North security zone, I would be able to see only the carriageway details for Queen Street. If I opened the drainage table, likewise I would only see the drainage records on Queen Street itself.
No records would show up for me for King Street. To see information for King Street, I would need to switch over to the South security zone. When I do this, the information for Queen Street would then no longer be visible.
A couple of points of further clarification;
- what you can see and do in RAMM is based on a combination of multiple different security elements. Security zones are only one part of the security puzzle. There are other controls beyond security zones, that will also influence what access a user has.
- security zones provide other types of functionality within the system. The specifics of this goes beyond the scope of this post. However to give you a quick idea, things like default surface lives can be defined at an individual security zone level.
Does my database have any security zones setup?
The short answer is yes! Every RAMM database has at least one security zone in it.... the 'Entire Network' security zone.
The Entire Network exists by default in all RAMM databases, and contains every single road in the database.
Every subsequent security zone setup, is ultimately a 'child' of the Entire Network. If you create a new road while connected to one of these child security zones, it will be automatically added into the Entire Network zone as well.
Setting up a security zone in RAMM
Now we will get into the steps required to setup a security zone in RAMM. What we are aiming for at the end is to have a new TalkData security zone, which contains only the TalkData roads in the database.
You can also use RAMM Manager to setup and maintain security zones. For today however, we will just focus on the RAMM HTML browser interface to do this.
Let’s go….
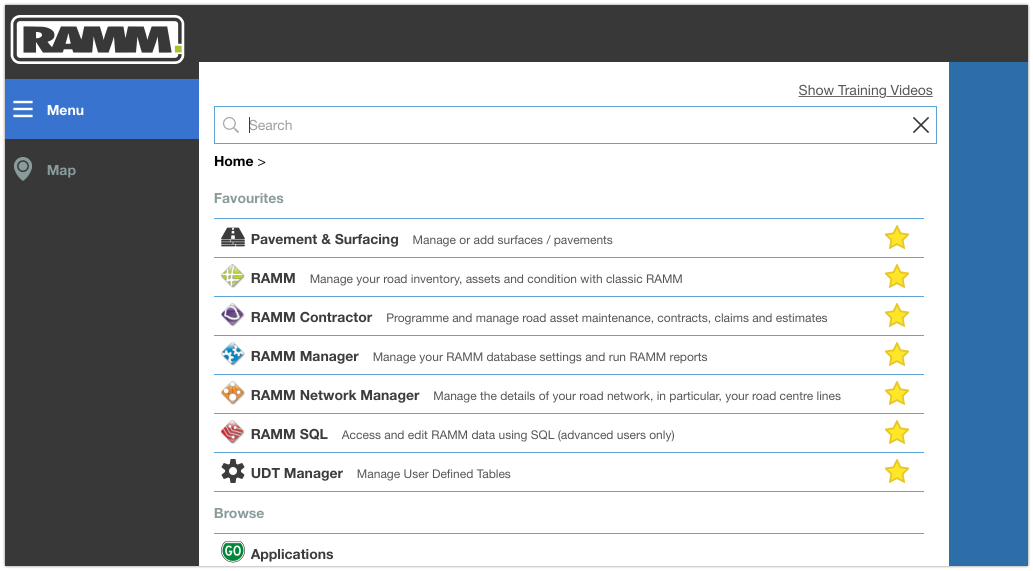
Connect to the RAMM database and open the RAMM Menu screen.
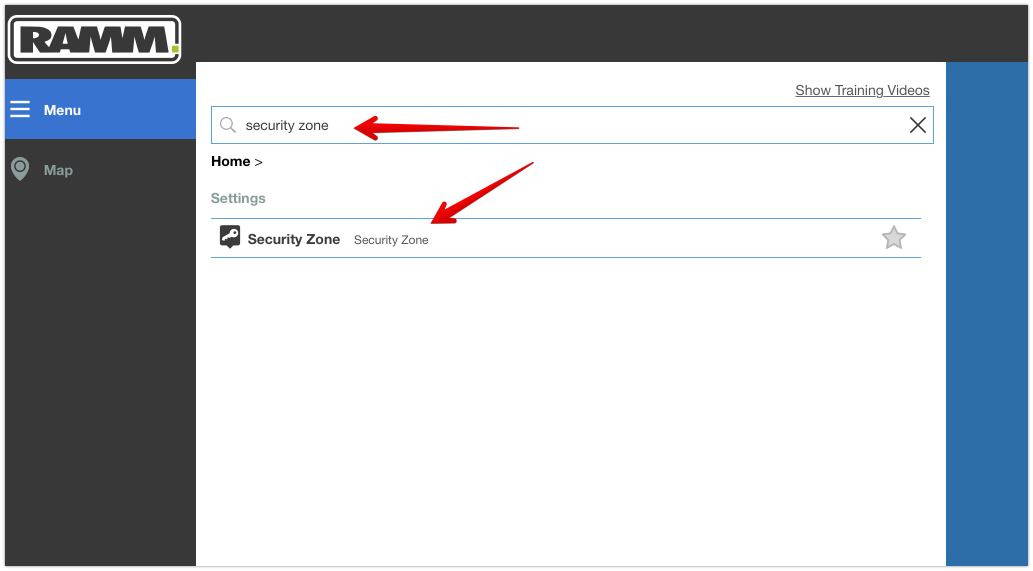
2. Type ‘Security Zone’ into the search box to find the menu shortcut for Security Zone settings.
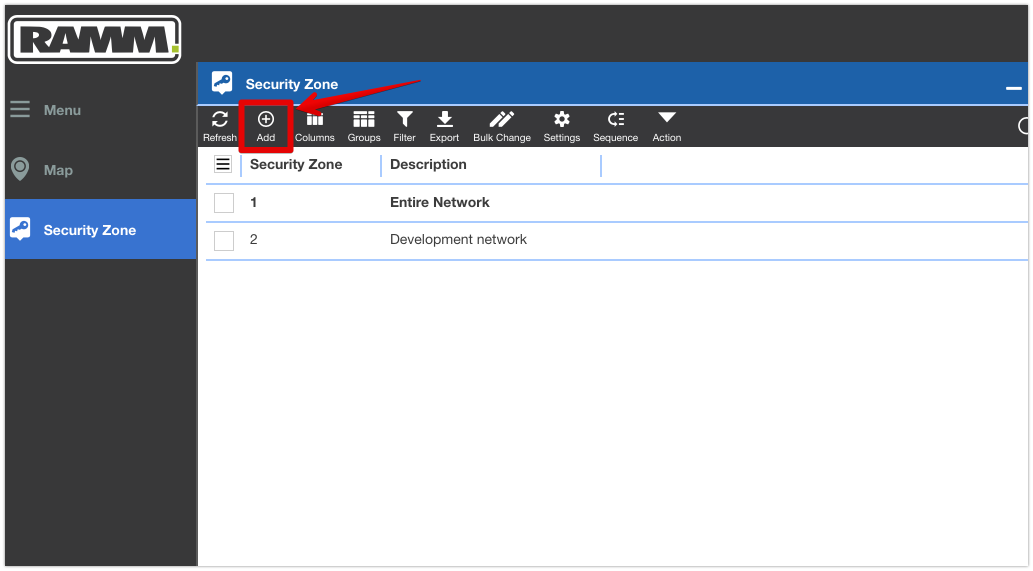
3. Clicking on the shortcut will open a list of security zones currently defined in the database. You can see below there are two security zones; the Entire Network security zone which exists by default, plus a ‘Development network’ zone that I had previously created. From here we can click the Add button to create a new security zone.
4. A detail screen (blade) will then appear. Here you can add some basic details about the security zone. For our purposes today we will only put in a description (i.e. what we want the name of the security zone to be) and set the Parent Security Zone option to Entire Network. Click the Save button when done.

5. The screen will update showing that RAMM has assigned the security zone a unique ID, and locked the Parent Security zone to the option chosen in the step above. A new option will also appear at the bottom of the screen to Show Roads in the security zone.

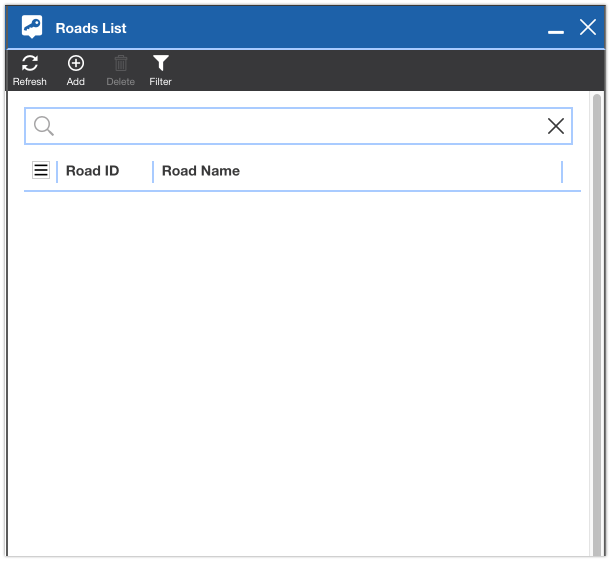
6. Click on the Show Roads option at the bottom of the screen. This will open another screen (blade) with the list of current roads included in the security zone. As this is a brand new zone the list is still empty.
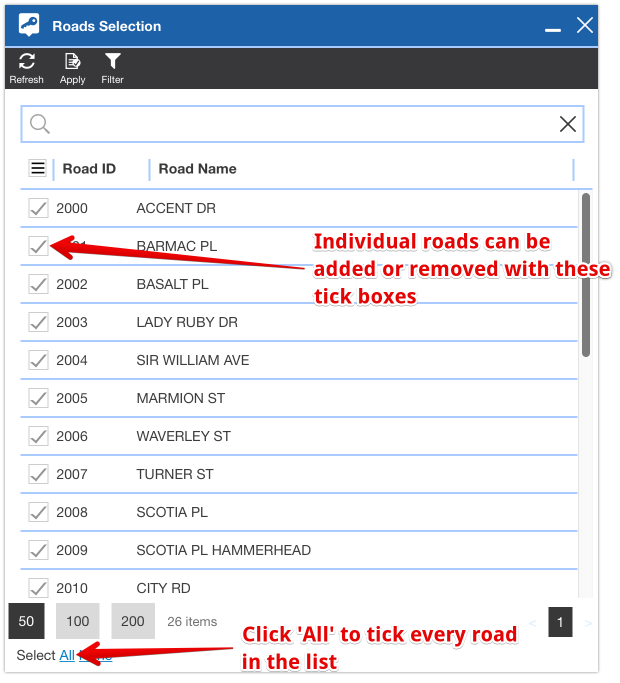
7. Click the Add button in the top menu. This will open yet another screen with the list of roads available in the Parent security zone that we chose earlier. From here you can either; select every road in the list, manually run through and tick individual roads to include, or set a filter to select the relevant roads. In the screenshot below I have chosen to use a filter to limit the road list to just the new TalkData roads (I created these roads in RAMM starting at a road_id of 2000, so a simple >= filter can be applied to find them).

8. With my filter applied I can now tick all the roads to add to the zone. This can be done manually, or using the shortcut button at the bottom of the road list.
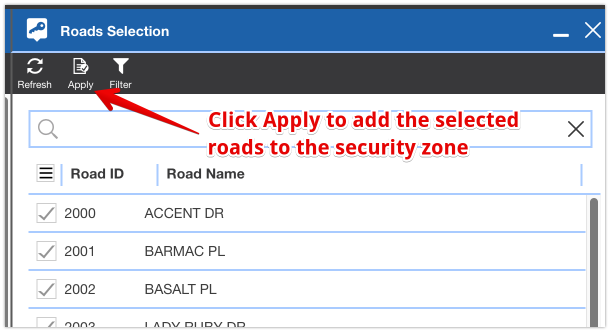
9. When you have finished selecting the roads to be included in the security zone, click the Apply button in the top menu.
10. The security zone has now been updated to include all of the chosen roads. The final step is to save the changes, and our security zone setup will be complete.
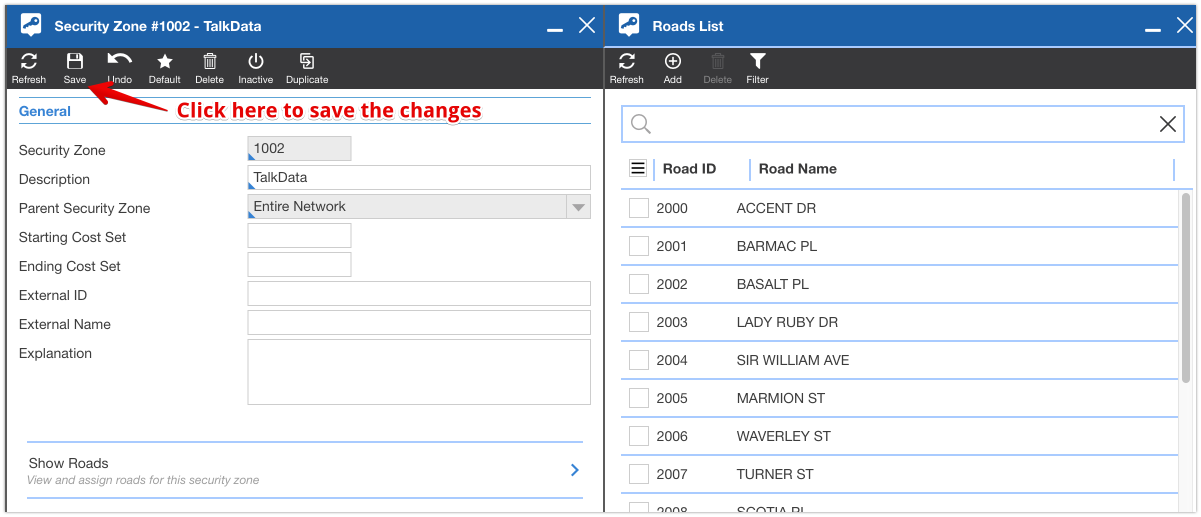
And thats a wrap. We now have a new TalkData security zone setup in the database. This security zone only contains the list of roads I have chosen to include from the Entire Network.
Now when I log into RAMM and connect to the TalkData security zone, the roads I see will be limited to our TalkData network!