RAMM Download Series: Classic RAMM
This is the second entry in our on-going RAMM Download Series.
The RAMM Download Series looks at a few of the different ways that you can download or export data from RAMM. Often you will want to use your data with other tools in your decision making and communication/presentation workflows. So you need a way to easily and efficiently get your data out of RAMM.
The primary focus of the series is on some of the more common and accessible methods for getting this done.
Each posts looks to achieve two key objectives:
Export the carriageway dataset (based on the TalkData network), including every record in the table.
Get this exported data into an Excel spreadsheet.
Today’s post walks through how to download data from the Classic RAMM application.
This app is being phased out
Now a quick note before we get into the process you need to follow. The Classic RAMM app has been a mainstay of the RAMM product line for a very long time, and was always one of the primary tools for working with RAMM data (depending on your preference it was either this app or RAMM SQL).
Now however, these classic apps are reaching the end of their useful lives, as ThinkProject transitions the RAMM product line to an HTML based toolset.
There is a fairly obvious hint this is happening when you open Classic RAMM, as you are presented with a bright yellow banner which is permanently placed near the top of the screen.
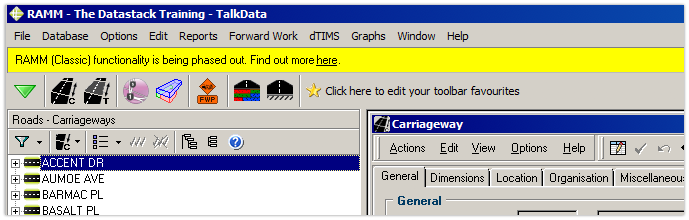
The bright yellow banner informing users the Classic RAMM app is being phased out.
That said, the app is still managing to hang-on in a production capacity for the time being, even despite some of its many features being deprecated in recent times.
Launching the Classic RAMM app
As Classic RAMM is not an HTML app, you need to launch the programme in a Citrix environment from the RAMM Menu.
The app is still listed as one of the default favourites in the RAMM Menu. So if you can see it listed there, you can just click the RAMM shortcut to open the Classic RAMM app.
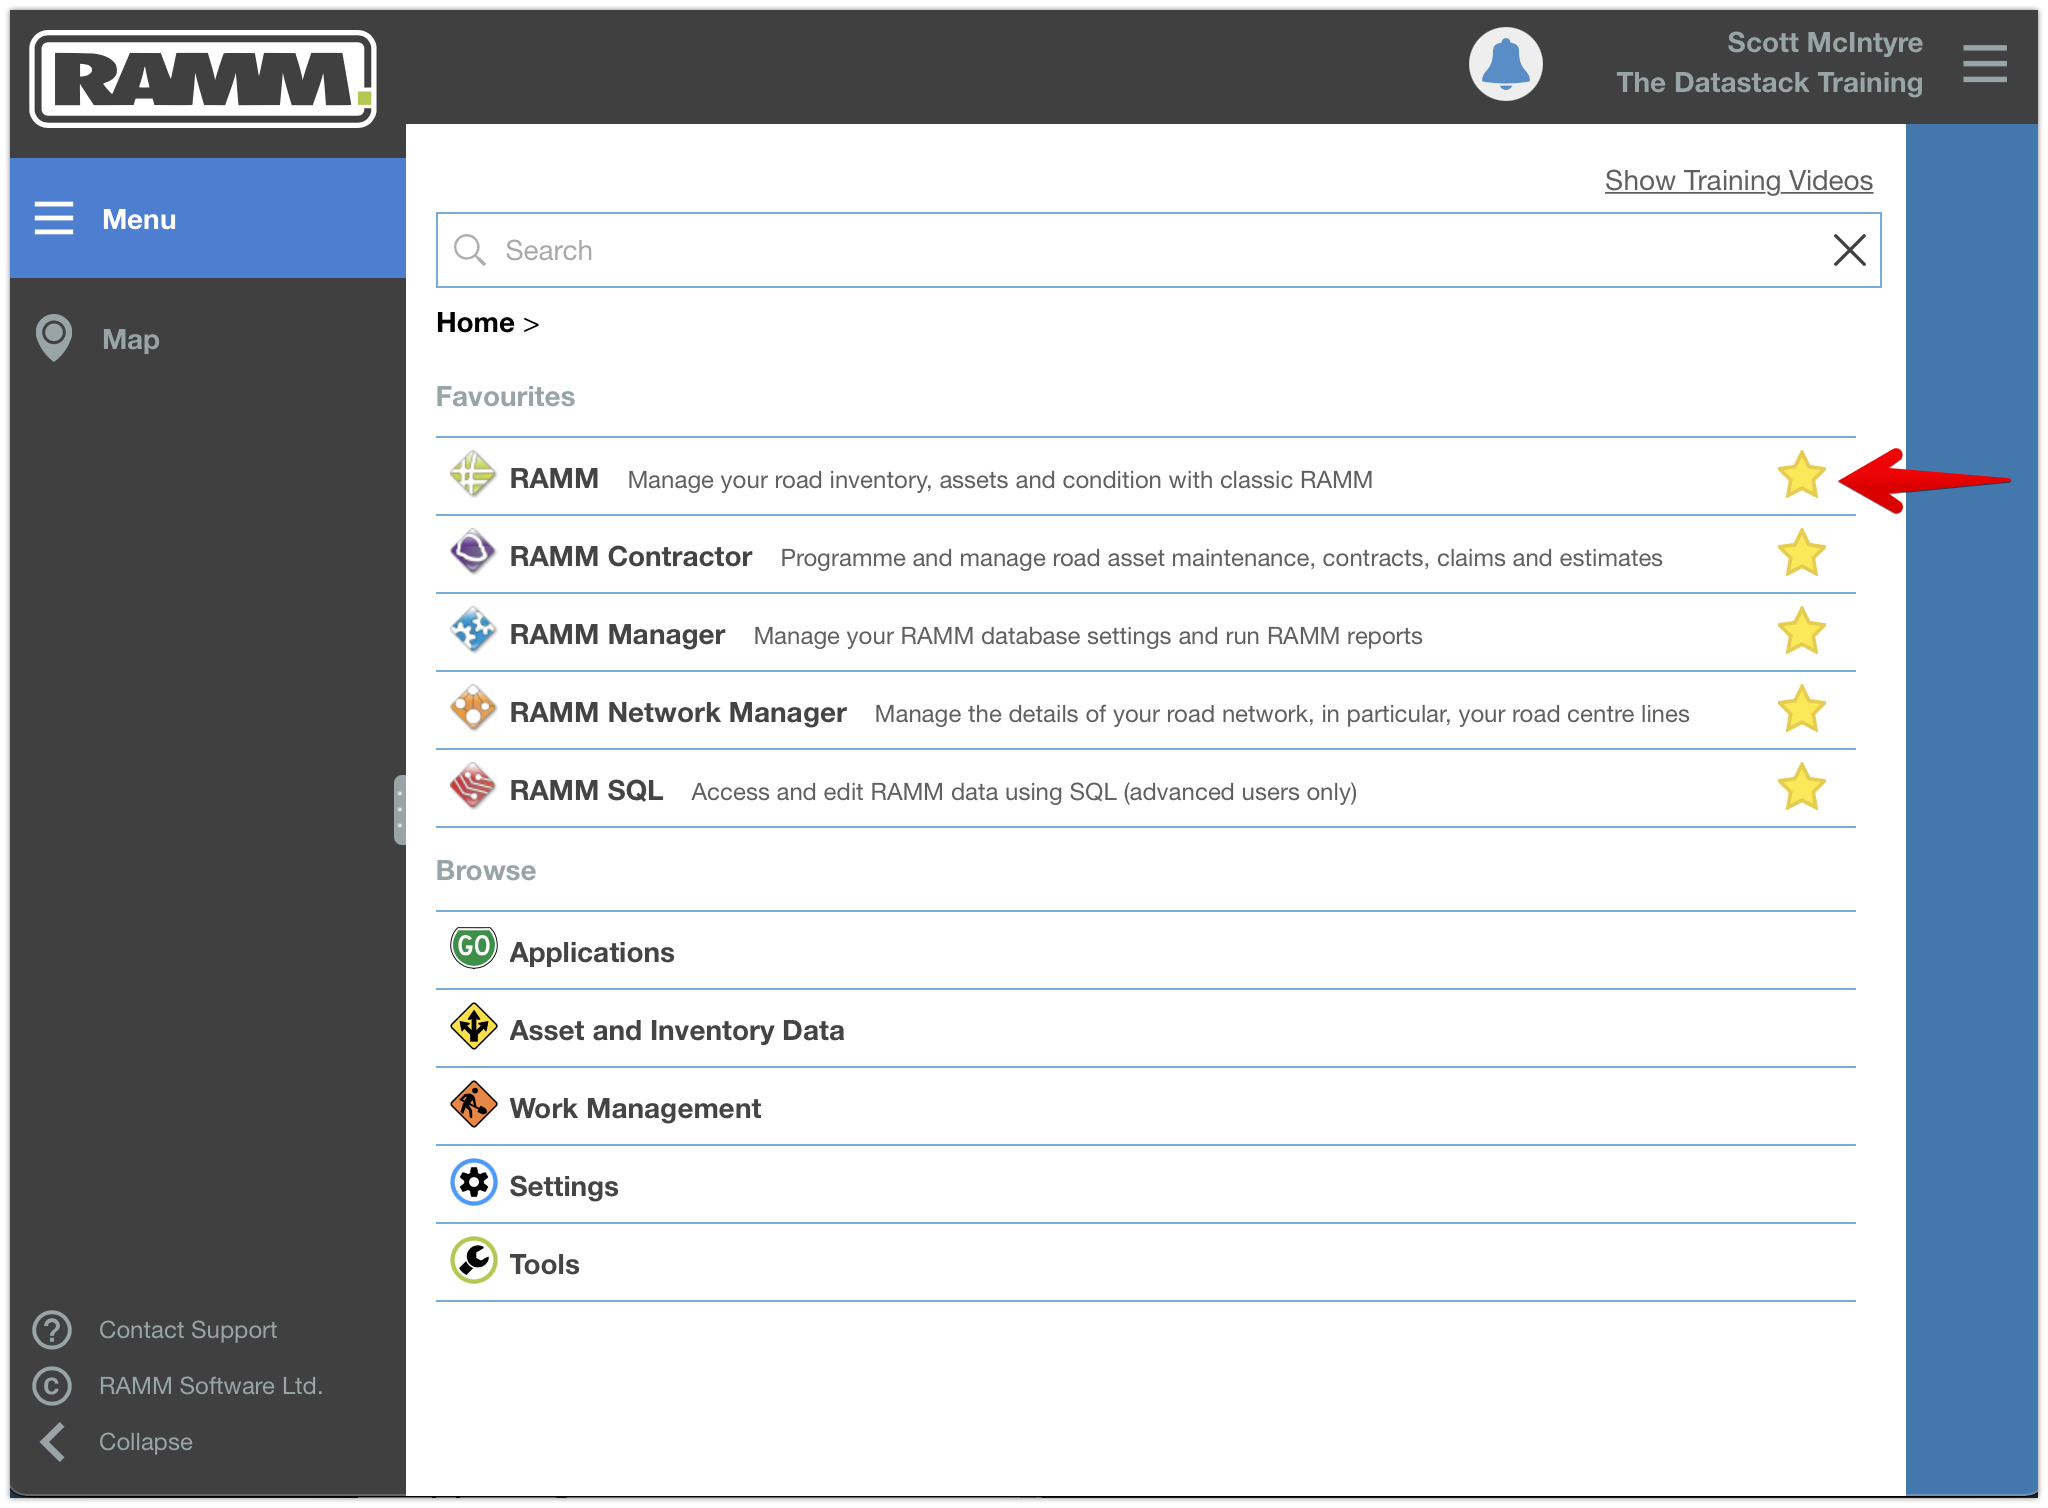
If you can’t see the application listed in your Favourites section, simply type ‘classic RAMM’ into the search bar to find it…

Opening the carriageway table
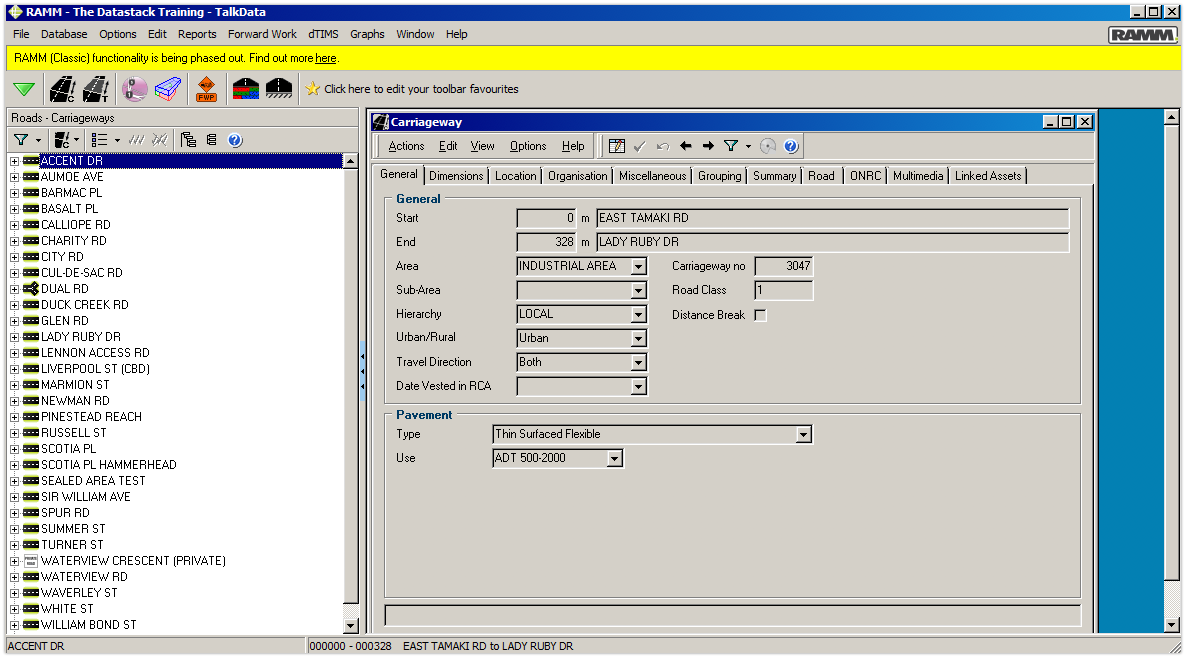
When Classic RAMM opens up, you will be presented with the (very familiar for RAMM veterans) default screen. This will show the list of roads in the network (or security zone) down the left, and the carriageway table in Detail view on the right.
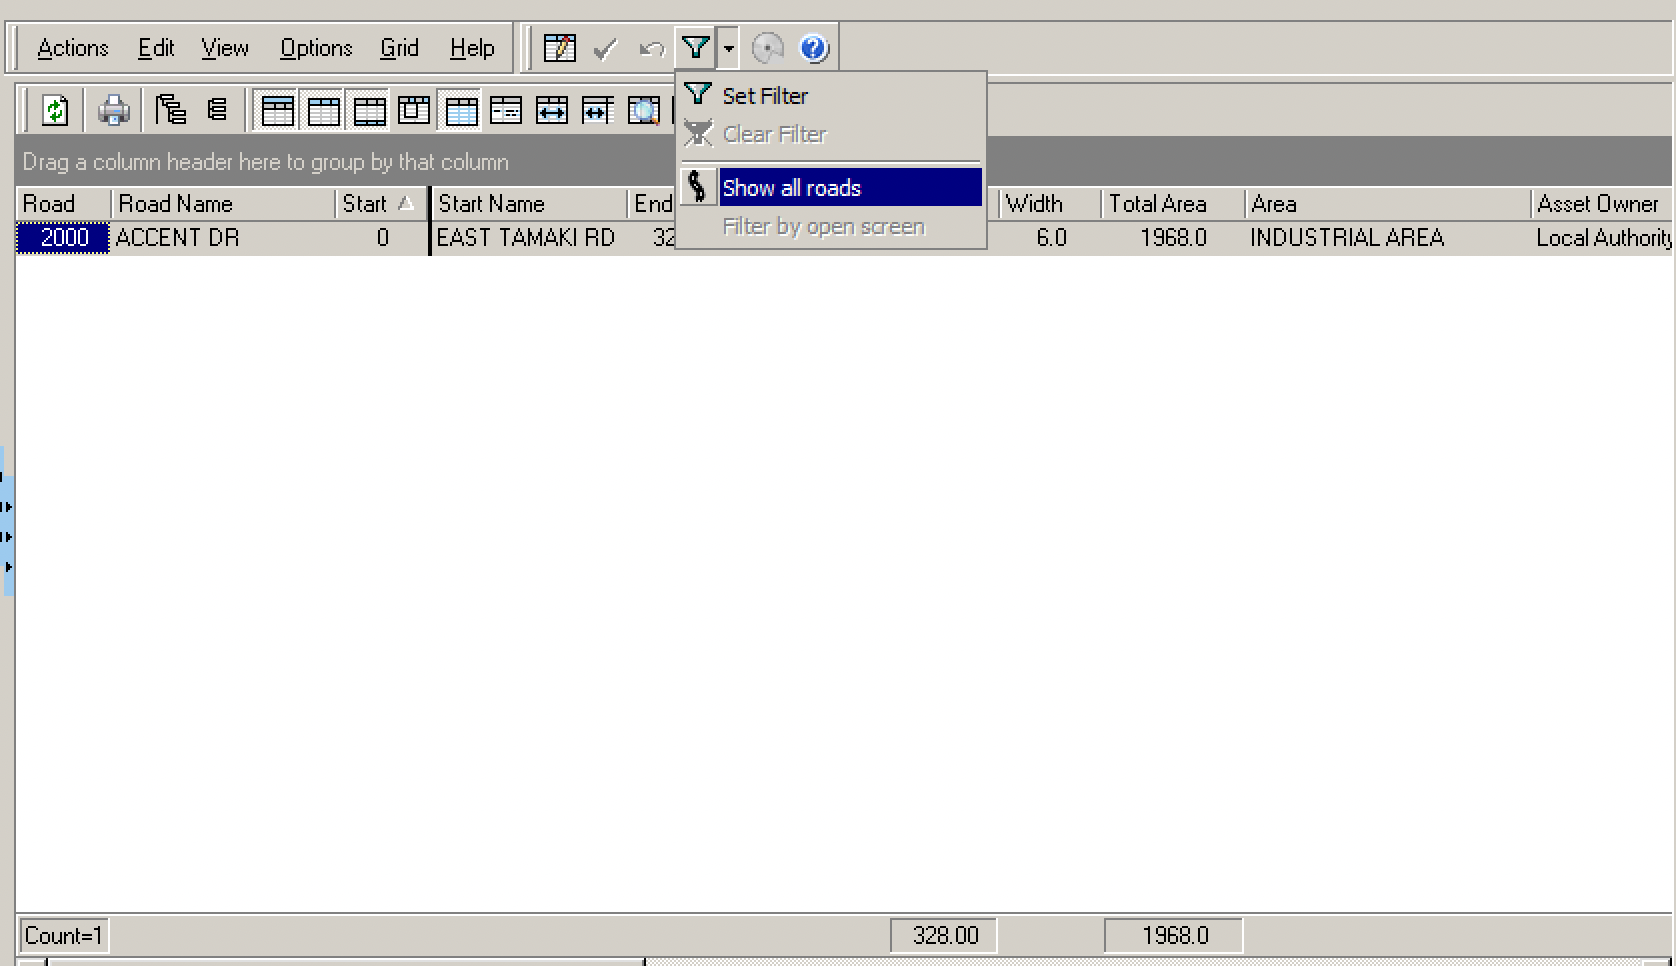
The Detail View shows only a single record at a time. This can be changed to a grid view, which is more like an Excel spreadsheet i.e. with lots of rows of data. To switch over to the grid, click on View in the toolbar and select Show Grid…

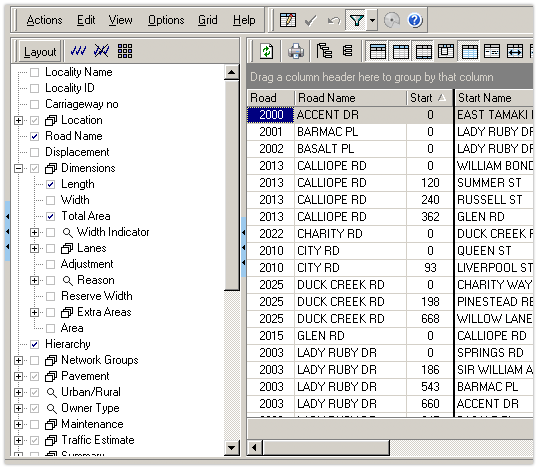
The screen will then switch over to the grid view, and display all the carriageway sections for the road highlighted in the road list panel on the left.
In the screenshot below, there is still only a single carriageway section showing in the grid. The selected road in this example is Accent Drive, which only has a single carriageway section for the whole road. If your currently selected road has more than one carriageway section then you should be seeing more rows in the table…

Showing the data for all roads
As stated up top, the objective of the post is to export all of our carriageway sections. So to do this we need to show data for all the roads in the network, not just the current selected road.
There are a couple of ways to do this. One of the quicker ways is to click the little down arrow next to the filter icon. This will show you some filtering options.
Simply click Show all roads to get the data for every road in the network….
After clicking Show all roads above, the window will refresh to show every carriageway section available ….

So now you should be seeing all the carriageway records for the network.
If you are happy with the data you can see on screen, then you could jump straight to the export stage now. However there is one more useful step we will look at first…customising the columns showing in the grid.
Adding and removing columns in the Classic RAMM grid
The exact fields/columns you see on screen can change depending on a number of different factors. If there is data you want to add in, or similarly columns you want to remove, then it is possible to customise the table layout shown on screen.
To do this, you will need to click the little blue bar with three arrows pointing to the right. On screen this should be in the middle between the road list panel on the left, and the data table on the right.

The layout panel should now be on screen, allowing you to add or remove different columns from the grid….
There are a couple of options for adding/removing columns. For the purposes of this post we will just look at some of the basic options, as tagged A to D in the image below…

Button A (the three ticks): this will select every column available and show this in the grid view
Button B (the three crossed-out ticks): this is the reverse of button A - it will deselect every column and leave your grid blank
Button C (the 9 little squares): this will turn on the RAMM defaults - this can be a useful ‘reset’ option if you want to revert back to basics
You can also work through and individually add/remove columns as needed. This is denoted as pption D in the picture above, and refers to all the check boxes listed next to each field.
Once you are happy with the columns you can see on screen, you can proceed to the next step to export the data.
Exporting the carriageway section data from Classic RAMM to Excel
The classic RAMM apps have a number of different file formats to export your data to. To see these options, you need to click on the Export button in the toolbar.
In the screenshot below you can see the file types available include Excel, HTML, XML, Text, PDF, RTF, EMF and Clipboard. Depending on what exactly you are trying to achieve, often the quickest option is to dump the data to your clipboard. You can then paste this information where you need it.
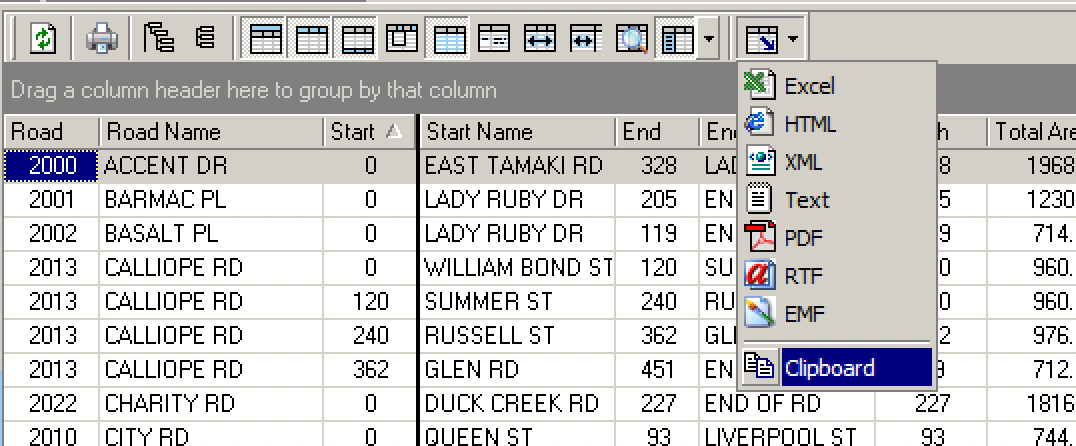
Just a note about the Excel option. In the classic series of RAMM applications, it does export the data out in Excel 2003 format (as .xls files). Depending on the Trust Center settings for organisations or users, it can make it difficult for some people to open these older format files. Copying the data to your clipboard and pasting into Excel can alleviate some of those issues.
With our data copied we can now paste the data where we need it. In this case we will use Excel…
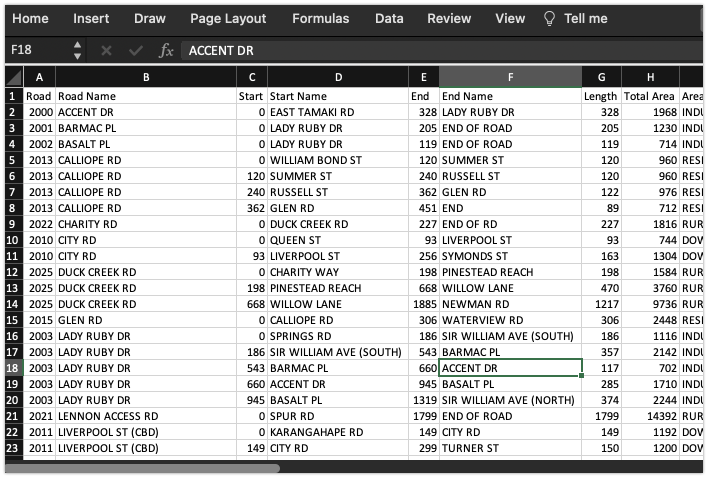
And what we end up with is our carriageway data in a spreadsheet, matching the columns we selected earlier when we customised the grid in Classic RAMM.
That wraps up today post about exporting data from Classic RAMM. We still have more posts to go in the RAMM Download Series, so check back soon for future instalments, or subscribe to our newsletter to get future posts sent straight to your inbox!